How do you select the right equipment for your IP camera system? The surveillance system is more than just the IP camera. It also includes the video recording system, lens, lighting, camera enclosures, network switches, and mounting brackets. Everything has to work together so you get the security system you expected.

Selecting the right equipment for your security system can be quite complicated. Sometimes it’s like putting together a puzzle. We need to make sure we have the right camera, but does the camera work with all the other equipment?
We would like to be notified of alarm conditions, but does the video recording system provide alarm notification? We would like to mount the camera on a pole, but does the camera include image stabilization? As we decide on one thing, it can affect other parts of the system.
In this article, we provided a real-life surveillance example and then defined a complete surveillance system.
Acme Manufacturing would like to view a parking lot and a tool crib area. We need to define the cameras for each area, the video recording system, and determine what the most cost-effective solution will be. Here’s how we do it:
Setting the Objectives for Your IP Camera System
First thing we need to do is understand what our objectives are for each area. Each area could have a different objective.
So here’s a summary of things we need to define:
- How large an area do we want to view?
- What detail do we want to see with our cameras? Do we want to just view people or be able to identify their faces?
- Do we want to operate day and night?
- Do we want to be alerted to alarm conditions?
- How long do we want to store the video?
Acme manufacturing had some cars broken into in the parking lot so they want to be able to monitor this area. Tools have vanished from the tool crib in the manufacturing area so they want to see who is going in and out of the area.
In the parking lot management would like to be able to read a license plate number. In the tool crib, they would like to identify a person’s face. They would like the system to let them know whenever someone is in the tool crib, and to record the video when motion is detected. They have also decided to add additional cameras in the future to monitor their manufacturing area.
Defining the Viewing areas and Camera Distance

The next thing we need to do is define our viewing areas. The area we would like to view is called the field of view. We then need to determine how wide this area is, and then how far away the cameras will be. Take a look at our previous article, “Calculating What You Can See with Your IP Camera”.
The distance depends on where we can mount the cameras. For example, in the parking area, we may decide to mount the cameras on a pole or a wall. We need to measure the distance from each camera to each field of view that the camera is monitoring.
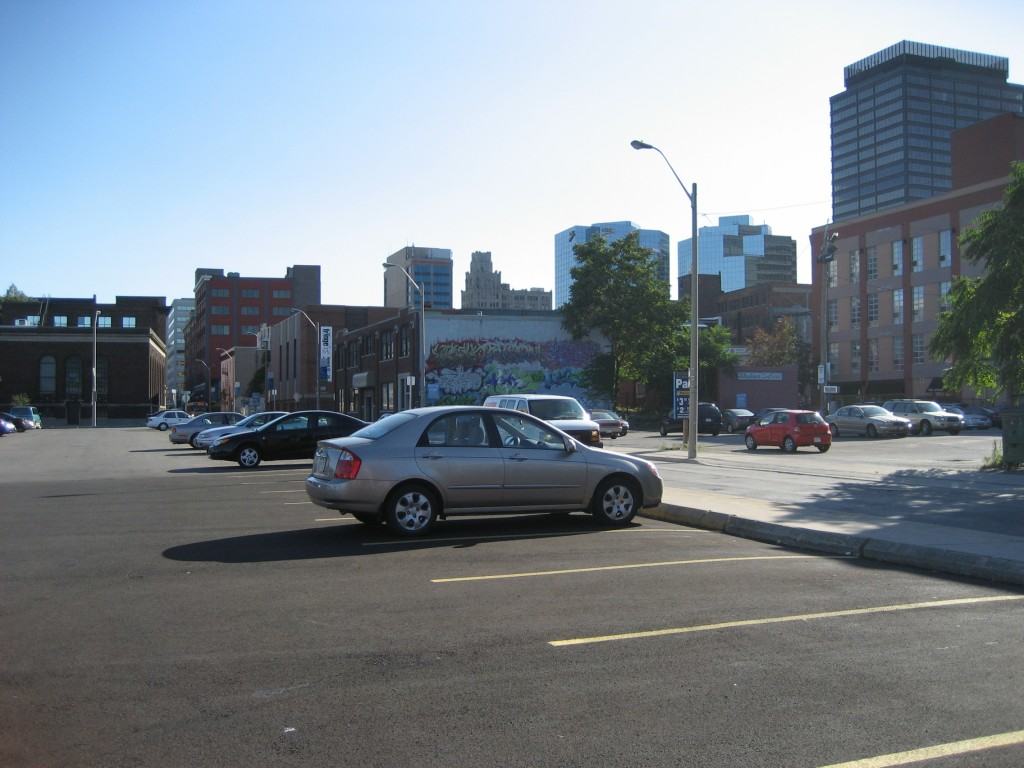
Cameras for the Parking Lot
The parking area is 80 feet wide by 160 feet long. There are some lights which provide about the same light as a full moon. We will select cameras with good low light capability. Since it is possible to have wide differences in light in the morning and in the evening when the sun is low in the sky It would be a good idea to use a camera that has a better wide dynamic range (WDR). The parking lot can be monitored using a PTZ camera, or by a number of fixed high-resolution cameras.
If we use the PTZ camera we can set the camera to automatically patrol through a number of different positions, but there is the chance we may miss something when the camera is looking in the wrong direction.
If we use many fixed high-resolution cameras we can view the entire parking lot at the same time. Since the parking lot is 80 ft. wide and 160 ft. long we will require a number of cameras at each side of the parking lot to cover most of the area.
So which way should we go? Let’s compare the cost and labor involved between the two approaches.
Using a PTZ Camera
First, let’s look at using one PTZ camera to view the parking lot. We can also add some fixed cameras to view the entrance and exit of the parking lot. This can provide more detail such as the license plate number of all the cars entering and leaving.
The PTZ camera can be placed in a patrol mode and sweep the entire parking lot area. If we use a high-resolution PTZ IP camera we require less positions than if we use a standard VGA resolution PTZ camera.
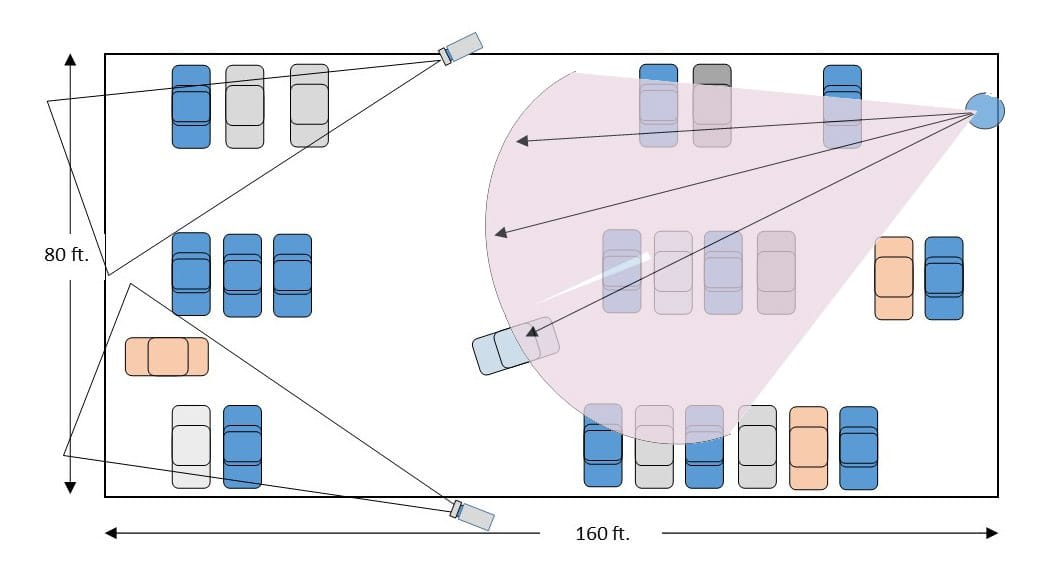
Samsung has very nice outdoor PTZ cameras with 2-megapixel resolution. They cost around $2,500. This camera allows us to see a field of view that’s about 35 ft. wide.
We can also use two outdoor fixed IP dome cameras from IQinvision (now part of Vicon). They recently introduced the 3-megapixel IQM63 dome IP camera, which provides good low light capability and WDR. The camera has a remote zoom and focus lens that allows you to adjust the camera’s field of view from your computer. It makes it much easier to install. They cost about $650 each. The total before labor is $3,800.
Using Fixed Cameras
The alternative approach is to use a number of fixed cameras. Here’s a diagram of one possible layout. The actual camera positions will depend on where you find the easiest place for mounting the cameras. They can be placed on a pole or on the side of a building.
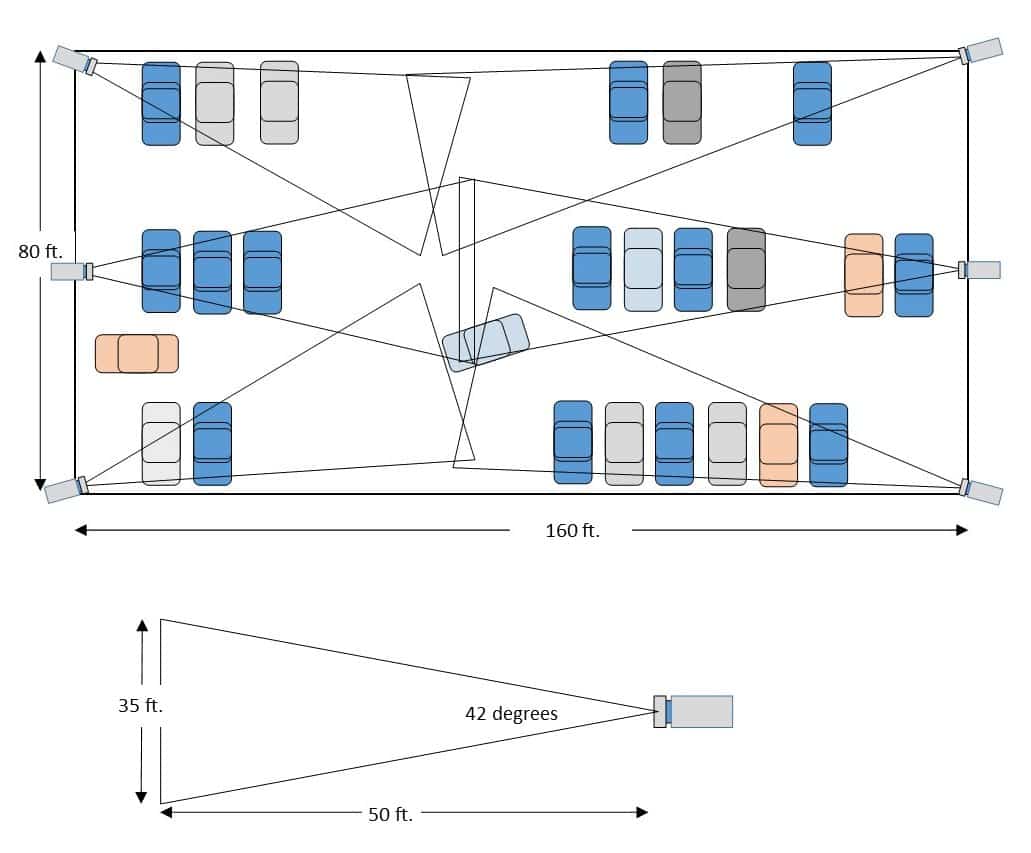
The IQeye IP cameras cost about $650 each so the total cost of this configuration is $3,900.
Cost comparison of IP Camera Systems
So which approach is better? We know that the two approaches have different capabilities. The PTZ system can view a large area, but sometimes the PTZ camera can miss things. The fixed IP camera system requires more cameras and will cost more. Here are more details about the comparison.
The PTZ system costs about $3800 for the camera equipment. Next add the Video recording system. The Video Management Software license costs about $200 per camera (3 x $200 = $600). This can vary depending on the recording system and computer costs. So the subtotal for the PTZ system (cameras plus recording software) is $4,400. Next, add labor for getting the wiring to the cameras and installation of the system. Let’s use $500 per camera for this, so it adds another $1500. Of course, this can vary quite a lot depending on the local labor rates.
The grand total for a PTZ system is $5,900.
The 6 fixed cameras cost $3900 for the cameras. Add 6 x $200 / camera for the recording software license, and the total is now $1200 more, or $5100. Next add the installation cost at $500 per camera = $3,000.
The grand total for the fixed IP camera system is $8,100.
Yes, the fixed camera system is more expensive, but if your objectives is to see everything all the time, this is the best choice. The best system will depend on your objectives and budget.
Camera for the Tool Crib
The camera for the tool crib will be easier to select. Since this is a relatively small area, the 30 by 30 feet area can be monitored by only one camera. Since the goal is to identify a person coming into the tool crib area, we can face a camera towards the doorway and still see what happens inside the crib area. We can even consider a camera with a fixed lens (rather than a variable lens).
The Sony XM-632 camera is a good choice since it has a wide 113-degree wide-angle lens and 2-megapixel resolution. It even has a built-in microphone so we can hear what’s going on in the tool crib.
The camera costs about $525.
Video Recording System
There are a number of different types of video recording and management systems available that will work with our IP camera system. We can select video management software (VMS) that runs on a standard Windows computer, or a network video recorder (NVR) that includes the computer and software in one box.
The NVR is very easy to install. You just need to tell the system about each of the cameras that will be installed. It is important to select an NVR that supports the cameras you selected. Many new cameras conform to the OnVIF standard and some NVRs also support OnVIF cameras. This provides a standard interface for the cameras. Unfortunately, there could be issues with certain cameras, so it’s best to select the NVR that supports the specific manufacturer’s cameras. The NVR also supports a maximum number of cameras. For example, you can select an 8-camera, 16-camera or 32-camera NVRs. If you plan to add additional cameras you may need another NVR.
Video Management Software is a good choice when you have an IT person who can help install and support the VMS software. It is the most flexible solution since you can incrementally add cameras. The software is usually licensed with a base (or server) license plus individual camera licenses. In this example, we selected the VMS from OnSSi. The latest Ocularis VMS supports a very large number of manufacturer’s cameras, and provides a very easy growth path. The license for Ocularis Enterprise solution is:
The Enterprise base license is $999.
Then add the individual camera licenses, at $189 per camera x 7 = $1323.
The total software cost is $2322.
Conclusion:
A complete IP camera system includes cameras, recording system, and much more. All the components need to be compatible. The type of equipment and recording system depends on our objectives for the complete security system.
Well, this covers everything you need, from soup to nuts. Of course, your application will be different, so just contact us and we will customize the system to exactly what you need.
Need more information about video systems? Just contact us at 1-800-431-1658 or 914-944-3425. You can also use our contact form.