How to Save Money Installing the IP Camera System
Wouldn’t it be nice if it was easier to install IP cameras? After all, installation is a big part of the expense of an IP camera system. Some manufacturers provide IP cameras that are designed for easy installation. They thought about everything from how the cameras are placed in the box to the software tools that help with the final installation process. The installation time makes a big difference in the total cost of an IP camera system installation.
This article reviews the things that are part of an IP Camera system installation. We review the packaging, remote setup capability, and software management tools that reduce the time to install your IP camera system.
IP Camera Package Organization
The complexity of installation includes everything from the number of screws that are needed to how easy it is to install the camera on the network?
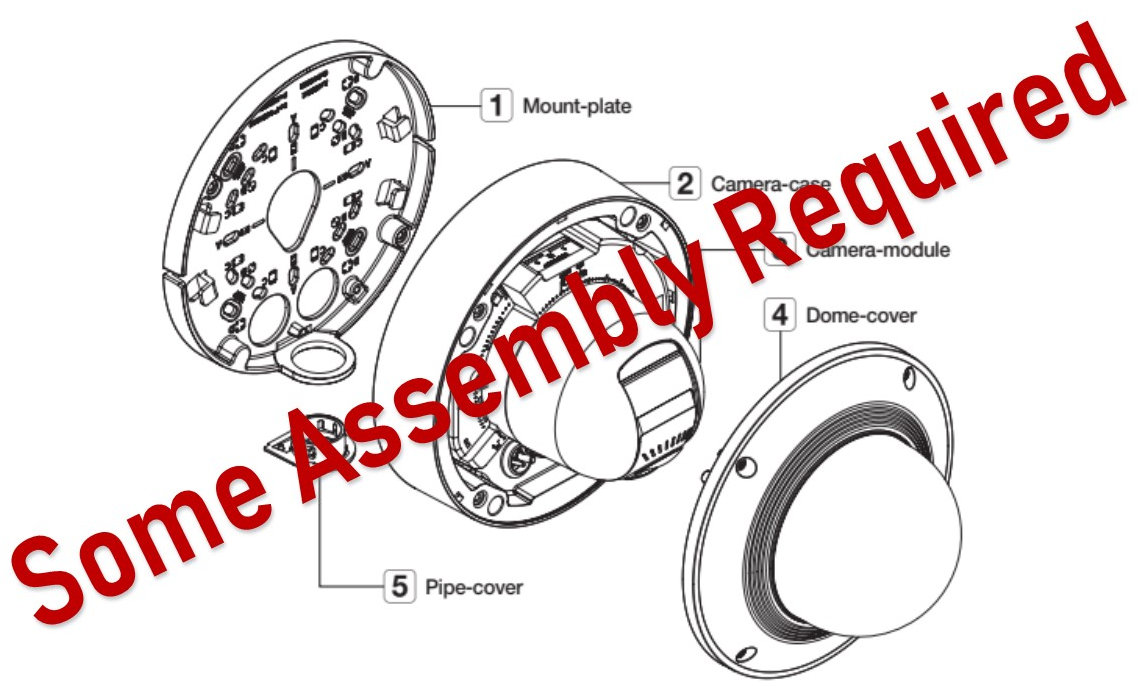
Installation is simplified when the number of steps required to install the camera is reduced. It is also helpful when the camera components are arranged in the shipping box for an organized installation. Have you ever tried to find all the brackets in the box? Are they located under the camera? When the camera is boxed for an organized installation, it makes a big difference.
The Wisenet X-Series plus provides an organized shipping box. When the camera box is organized so that the people who do the physical installation can remove all the brackets without removing the camera, it makes the process more efficient. Lower pay-scale workers can run the network wire and install the brackets. The cameras can be kept safe in their boxes until another person is ready to mount them. Once the cameras are installed, it is easy to set up the view, focus, and camera direction. By separating the mounting and wiring labor from the IP camera setup, adjustments, and registering the camera in the video management software, we can organize the installation according to the installation personnel required.
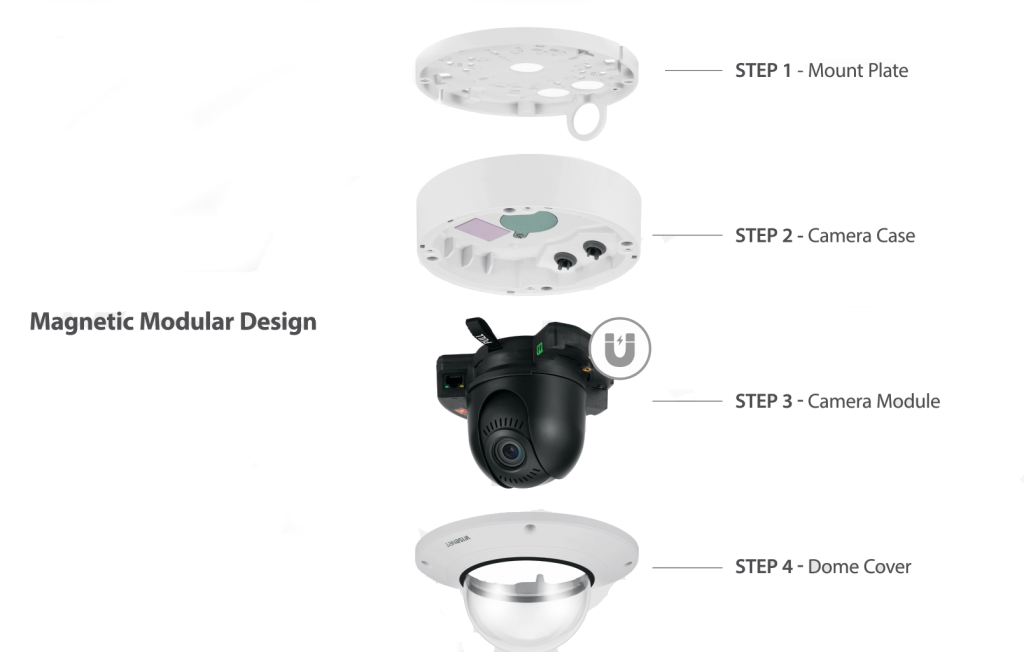
Hanwha introduced a very innovative mounting scheme. The Hanwha Wisenet Series-X Plus uses a magnetic mount instead of screws to mount the camera to the bracket. All the cameras in the “Plus” family can use the same universal mounts. This not only reduces the installation time but also allows the camera to be easily replaced if there is a failure. The universal magnetic mounting scheme also makes it easy to replace the camera. You can replace a defective camera or install a new camera in the same location using the same bracket.
Remote Camera Setup and Adjustment
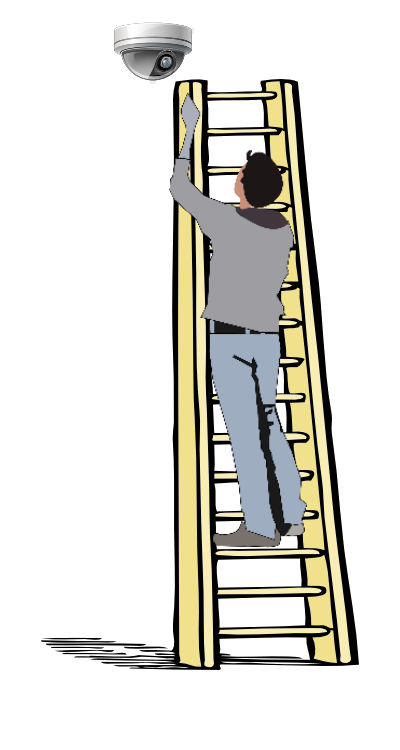
If you have ever stood on a ladder, adjusting the camera, you know it can be a time-consuming process. You may even require another person to help.
The new cameras include remote zoom and focus, and the more advanced cameras have the ability to pan, tilt, rotate, zoom, and focus (PTRZ).
The cameras can be aimed and focused from your computer. Or, as an alternative, the Wisenet X-Series cameras also can be adjusted from your smartphone using a USB dongle, and free smartphone app.
It makes life so much easier when you don’t have to make adjustments on a ladder. Yes, the cameras with PTRZ cost some more (about $40), but it may be worth it. You may save much more in the installation labor cost.
Examples of Cameras with Easy Installation Features:
- Remote zoom and focus
Examples: Axis P3375-LVE, and the Hanwha QNV-7080R - Organized packaged in boxes designed for installation
Examples: Hanwha XNV-6081 and XNV-8081R - Remote pan, tilt, rotate, zoom and focus
Example: AXIS Q3615-VE and the Wisenet XNV-6081Z
IP Camera Management Tools
Software tools are available from some of the camera manufacturers or as part of the video management software. These tools make it easy to set the IP addresses and many of the other camera settings. For example, Axis and Hanwha include software tools that allow you to remotely set-up their cameras.
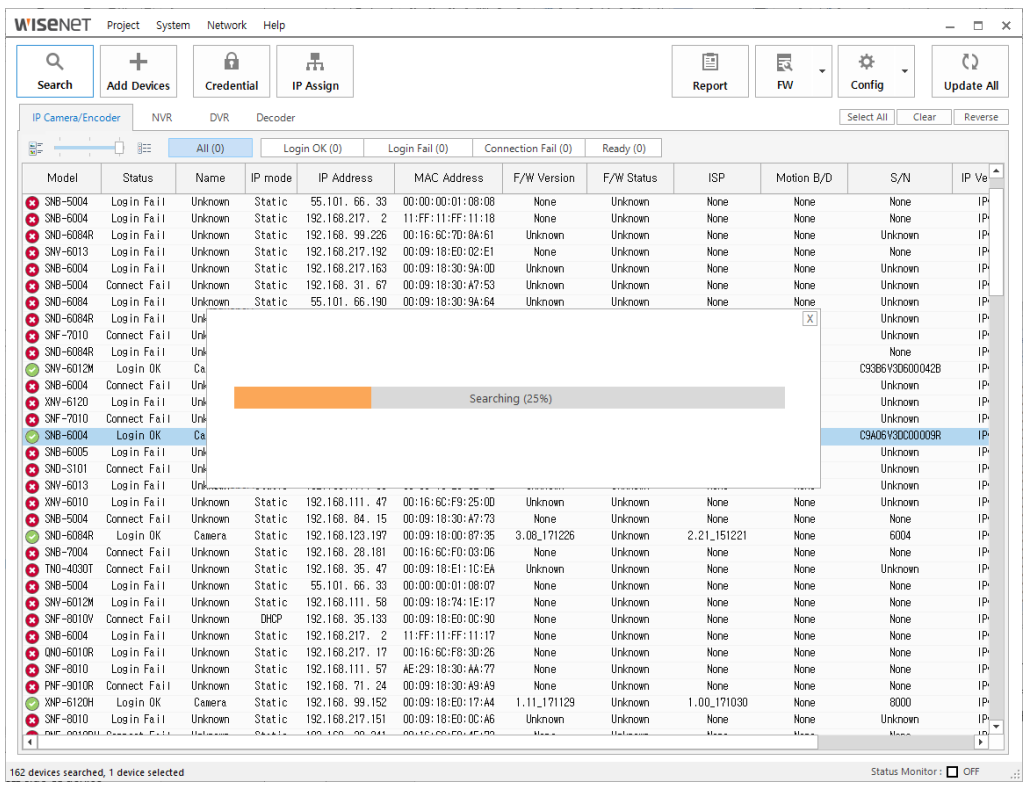
The Hanwha Wisenet Device Manager provides a very powerful set-up tool that allows the user to manage multiple IP network devices. Here are some of the things you can do:
- Search for your cameras. You can find all the Hanwha Techwin devices on the network. It displays a list that you can then use for management.
- Establish new projects. You can manage a set of cameras by assigning them to separate projects or groups. This allows you to administer a new set of cameras, or manage a group of cameras that are in a specific project.
- Display the Video from all the cameras. You can view a thumbnail image of the live video as well as seeing the information related to each IP camera. This makes it easier to select cameras and camera groups.

- Setup each camera or a group of cameras. You can select a single camera or highlight a group of IP cameras and then make changes to all of them in the group. You can set the IP address of multiple cameras, and change the passwords on all the devices.
- Set the Passwords globally: It is crucial to set a strong password on all your cameras. There have been many articles written about cyber-attacks on IP cameras. An article in Info Security described how “Five Million IP Camera Cyber-Attacks Blocked in Just Five Months.” Whatever you do, don’t use the default passwords. It makes hacking too easy. Longer passwords thwart brute-force cyber attacks on your IP camera system.
- View the live view of a selected camera. This allows you to make changes to a specific device. For example, you can change the PTZ view of the camera, or set the preset positions. This snap-shot record also provides a sign-off document that establishes the status and verification of the installation.
- Edit device name, so it is easier to identify. You can set a name that helps you locate the camera.
- Reach devices in a different network. In some cases, the cameras may be located on a different network than your computer’s network. In this case, there is a way to add devices on a separate network manually. You can register the model name, IP address, HTTP port, VPN port, ID, and password to reach these remote cameras.
- Create a report of all your network devices. The report can also include
- Firmware update: You can update all the cameras. You can select the one or more (up to 16 devices) and do a parallel update.
- You can save the configuration of all the cameras. You can select the IP cameras you want to backup.
Video Management Software
The more sophisticated video management software (VMS) and Network Video Recorders (NVR) allow you to do some of the things you can do with the camera management software. The right software can make it easy to add cameras to its management system. No matter which video recording system you use, it is important to consider how easy it is to add cameras to the management software system.
Ocularis and WAVE are examples of new video management solutions that include services that help during the camera installation. Here are some examples:
- Automated discovery of the IP devices on the network.
- WAVE is very effective with the Hanwha cameras and also supports cameras that provide OnVIF implementation
- Ocularis supports many camera brands including those that support OnVIF
- Ocularis and WAVE have a function that allows you to add and configure multiple cameras at the same time.
Summary of Installing IP Camera System
Installation is an essential cost to consider when planning your IP camera system. Manufacturers that make the job easier should be considered when selecting the IP cameras for your surveillance system. Everything from the way the camera is packaged to the way the cameras are set up should be considered. If the installation time is reduced by 20% or if less expensive workers can be used than money can be saved. The higher cost of these cameras can be justified by the reduced expenditure for installation.
If you need help selecting the right IP cameras for your security camera system, please contact us at 1-800-431-1658 in the USA, or at 914-944-3425 everywhere else, or use our contact form.